![]()
Maintenance works must only be undertaken after the temperature of each part has been lowered to less than 50 deg.C.
Place any detached items on a clean sheet or tray. Do not lose or contaminate these items.
Undertake the works using the appropriate tools. Any dirt on the tools being used must be wiped off in advance using gauze etc. dipped in acetone.
Tweezers (standard accessory)
|
1 |
Press the [SYSTEM] key on the GC unit and select "INJ Maintenance" in the PF menu. The temperature of the sample injection port and the column oven will lower automatically, and the supply of carrier gas will stop when injection port goes below 50 deg.C and column oven goes below 40 deg.C. |
|
|
2 |
Check that the message "Perform INJ maintenance" appears on the GC display. |
|
|
3 |
|
Loosen and remove the septum nut. |
|
4 |
|
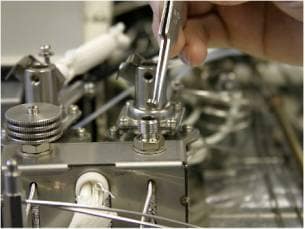
Detach the needle guide. |
|
5 |
|
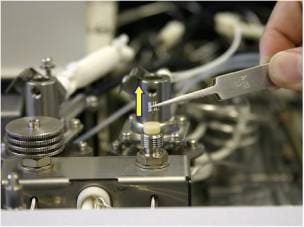
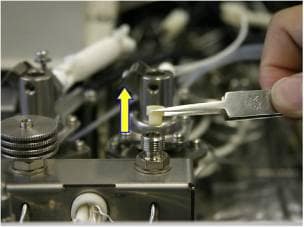
Remove the septum. Reference: Septum Types
On rare occasions the spacer may stick to the septum and get detached as well. If this happens face the slit downwards and re-set it. This spacer is removed if the AOC (Auto Injector) is used.
|
|
6 |
Replace the septum. |
|
|
7 |
Put back the needle guide. |
|
|
8 |
|
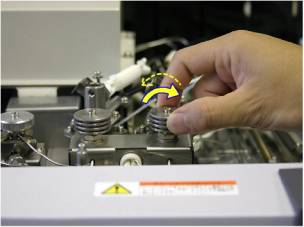
Tighten the septum nut fully, and then loosen it half a turn. |
|
9 |
(Press the [SYSTEM] key) Select "Analysis" in the PF menu. The GC will be automatically readied. |
|
|
10 |
Select "3. Analysis Counter" on the screen in which the [DIAG] key is pressed. Place the cursor on "Counter for Septum" and select "Reset" in the PF menu to reset the analysis count. |
|
Maintenance Top ; GC-2014 Main ; GC-2014 Detector ; GC-2014 Sample Injection Port ; GC-2014 Column Oven