![]()
Maintenance works must only be undertaken after the temperature of each part has been lowered to less than 50 deg.C.
Place any detached items on a clean sheet or tray. Do not lose or contaminate these items.
Undertake the works using the appropriate tools. Any dirt on the tools being used must be wiped off in advance using gauze etc. dipped in acetone.
10x12 wrench (standard accessory)
|
1 |
Shutdown the system and stop the gas supply for detectors. |
|
|
2 |
|
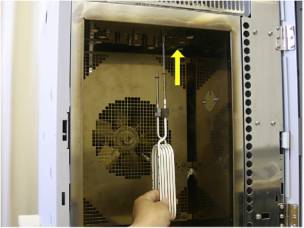
Pull the lever on the left hand side of the door to open the column oven. |
|
3 |
|
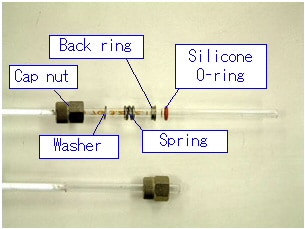
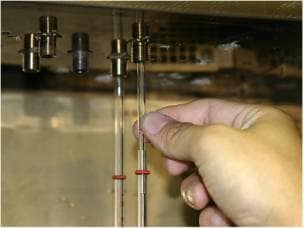
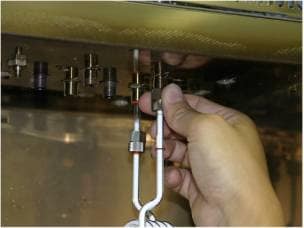
Set connecting caps at the both ends of the glass column. If using a silicone O-ring (under 250 deg.C), set the pieces in the following order: cap nut, washer, spring, back ring, silicone O-ring. The larger side of the back ring should face the silicone O-ring.
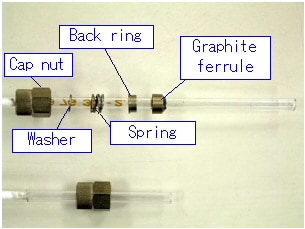
If using a graphite ferrule (for over 250 deg.C), set the pieces in the following order: cap nut, washer, spring, back ring graphite ferrule. The smaller side of the back ring should face the graphite ferrule.
|
|
4 |
|
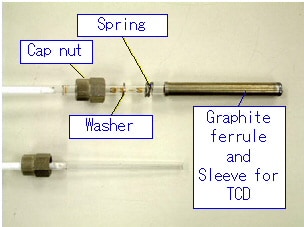
If using the TCD, the graphite ferrule and sleeve for TCD is used on the DET side. The back ring is not used. |
|
5 |
|
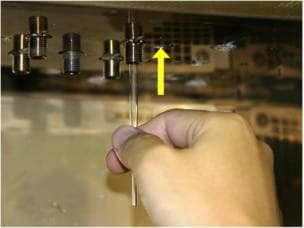
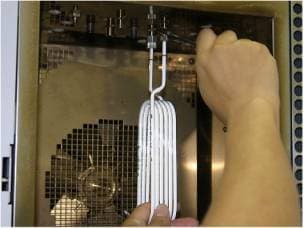
< Connection using the glass insert method > Insert the glass insert midway into the sample injection port from the oven side.
Put the glass insert into the injection port side of the column, which is the shorter side.
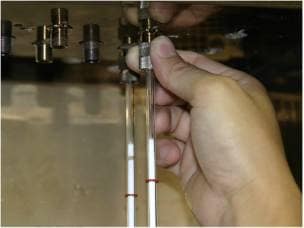
Insert the column as it is into the injection port/ detector and tighten the cap nut by hand.
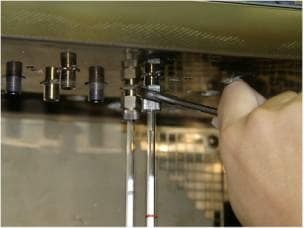
If the silicone O-ring is used, fix the connection by tightening it lightly. If the graphite ferrule is used, tighten it by a third or half a turn of the wrench to fix it.
The glass insert method is recommended for the analysis of liquid samples because it prevents the column from getting contaminated. Column innner diameter 3.0 - 4.0 mm; |
|
6 |
|
< Connection using the on-column method > Insert the longer side of the glass column into the injection port.
Insert the column as it is into the injection port/ detector and tighten the cap nut by hand.
If the silicone O-ring is used, fix the connection by tightening it lightly. If the graphite ferrule is used, tighten it by a third or half a turn of the wrench to fix it.
The on-column method tends to contaminate the column as the sample is injected directly into the column. As such it is principally used in gas analysis, where contamination tends not to happen.
|
|
7 |
Turn ON the power and set the start time to a large value like 5 to 10 minutes (or more) in the startup screen. Select the PF menu for "Start GC" and then start the instrument. Gas is sent from the AFC during the start time, but the temperature of the detector does not increase. Check for leakage during this period. Press the [Flow] key and set an appropriate amount of carrier gas, and then check for leakage. Apply soapy water or leak detection fluids such as Snoop(R) to the connections and check that no bubbles appear. If bubbles appear it means that there is a leak. Re-tighten the connections further using the wrench to stop the leak. (If a graphite ferrule has been used, leaks may occur depending on the temperature cycle. It is recommended that the leak check be repeated after raising the temperature.) Gas leak detection fluid Snoop Part No.: 670-11514 |
|
|
8 |
After ensuring that there is no leakage, close the column oven door. After the start time has ended, the temperature control of each part will be started. Press the [SYSTEM] key then press the toggle key to display PF menu, select "Start Seq" menu and set the start time to 0 on the screen. Then temperature control will be started immediately. If the leak check is finished in short time and if the gas in the column is sufficiently substituted with carrier gas, then you may increase the temperature without waiting for the start time to end. |
|
Maintenance Top ; GC-2014 Main ; GC-2014 Detector ; GC-2014 Sample Injection Port ; GC-2014 Column Oven