![]()
Maintenance works must only be undertaken after the temperature of each part has been lowered to less than 50 deg.C.
Place any detached items on a clean sheet or tray. Do not lose or contaminate these items.
Undertake the works using the appropriate tools. Any dirt on the tools being used must be wiped off in advance using gauze etc. dipped in acetone.
Glass insert wrench (standard accessory), 10x12 wrench (standard accessory), 6x8 wrench (standard accessory)
1 |
Shutdown the system. |
|
2 |
|
Open the column oven door. |
3 |
|
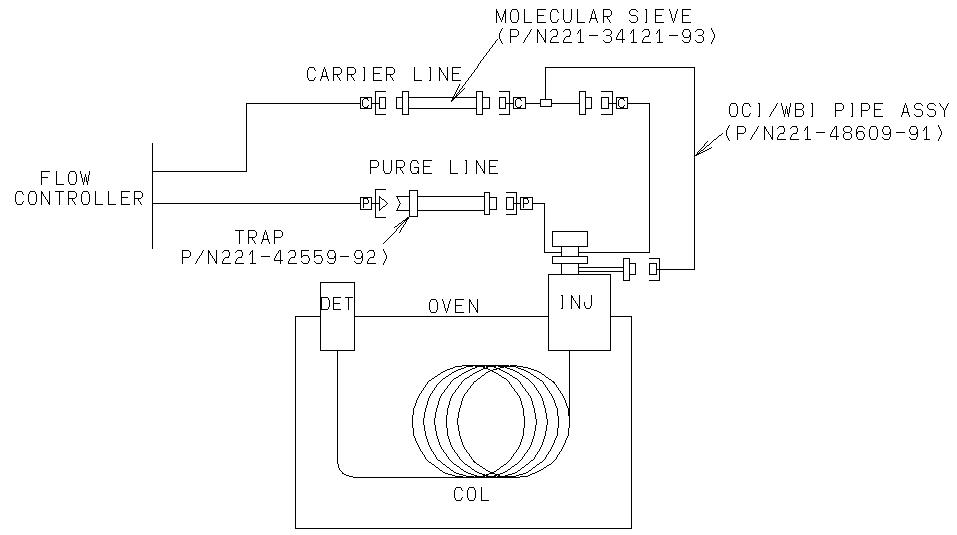
Check that the piping has been set to the OCI mode - with the carrier gas line bifurcated and piped to both the C-line and the split vent.
|
4 |
|
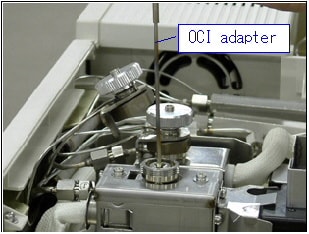
Remove the glass insert nut using a glass insert wrench, and check that an OCI adapter has been fitted to the insert. OCI adapter 221-49298-91 O-ring, P3 036-11201-84
|
5 |
|
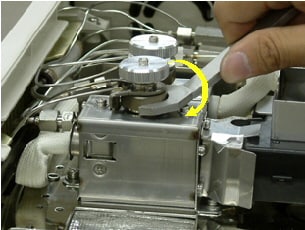
Tighten the glass insert nut using the wrench. |
6 |
|
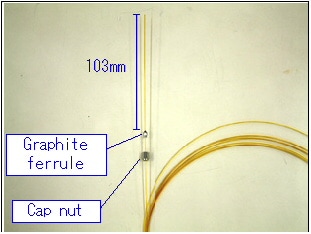
Let pass the 0.53 dia. pre-column (or the wide-bore column for analysis use) in a cap nut and then provisionally fix the graphite ferrule at a position of 103mm (use the graphite fixing jig for the SPL to tighten it to the extent that it does not fall out before setting the position). Deactivated capillary tube (no liquid
phase) 0.53mmx10m : |
7-1 |
|
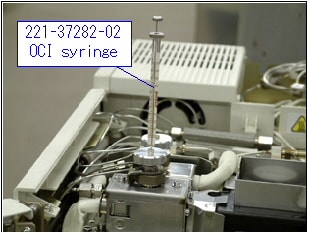
Insert the OCI syringe until it touches the bottom of the injection port. OCI syringe SSOT-221-37282-02 |
7-2 |
|
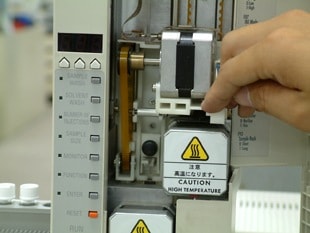
If using the AOC, open the door while the power is off. Hold the syringe drive unit attached to the OCI syringe with your hand and press the syringe all the way down to the bottom. |
8 |
|
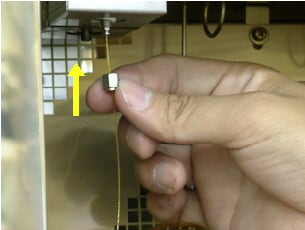
Insert the pre-column (or the wide-bore column for analysis use) from the column oven side. If it does not go in easily because the syringe needle is interference, move the syringe up and down slightly to align the center, which will make it easier to insert. |
9 |
|
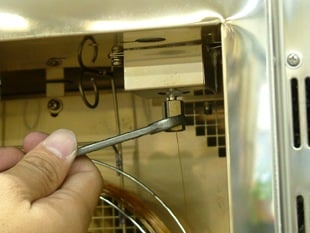
Insert until it touches the top and fix the nut. Be careful to let the column tip not crush upon fixing if the column has been pressed too hard. |
10 |
Pull the syringe out. Insert the syringe again and check that it goes in smoothly without getting caught by the column. |
|
11 |
|
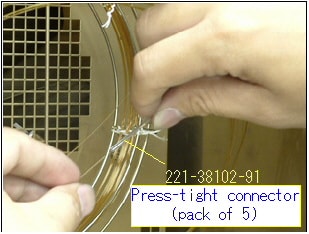
Hang the analytical column on the column hanger. Connect the pre-column and analytical column using a press-tight connector. Using the capillary cutter, make a square cut of the tips of the pre-column and analytical column in advance. Adding a small quantity of organic solvent to the column tip when connecting makes it easier to seal the polyimide part. Press-tight connector (pack of 5) 221-38102-91 |
12 |
On the column detector side, use the graphite fixing jig corresponding to the detector used to fix the graphite ferrule. |
|
13 |
|
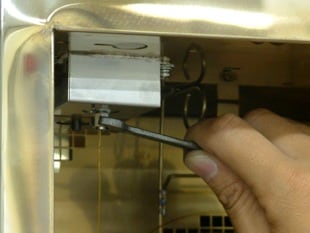
Attach the analytical column to the detector and fix in place using the wrench. |
14 |
In the case of the simple OCI method, a glass insert is used instead of the OCI adapter. The length of column inserted into the injection port side should be set to about 75mm. Fix it in place after inserting it until it touches. The inner diameter of columns that can be used is not limited to above 0.53mm. Glass insert OCI-2010 221-49381-01 (-02 deactivated) |
|
Maintenance Top ; GC-2010 Main ; GC-2010 Detector ; GC-2010 Sample Injection Port ; GC-2010 Column Oven